How Does Seinxon Finder Work With Find My Network?
Table of Contents
(Click on subheadings to quickly navigate.)
Ⅰ. About Find My Network
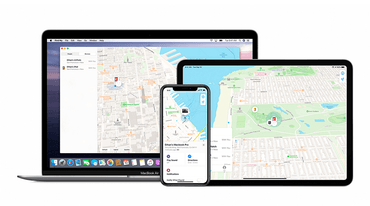
Please connect to the Find My network: Let users locate your products with the Find My network. With hundreds of millions of Apple devices worldwide, advanced end-to-end encryption, and industry-leading security, the Find My network lets users quickly locate their belongings in the Find My app with the peace of mind that their privacy is protected.

Ⅱ. Security and Privacy
You won't be able to see where other people's Seinxon Finder cards are, and they won't be able to see yours, either. Location updates are automatic and anonymous, so it's completely secure.
Ⅲ. How To Get Started?
What you need are:
- An iPhone, iPad, or iPod touch with iOS 14.5 or iPadOS 14.5 or later and two-factor authentication turned on;
- Find My app turned on;
- Bluetooth turned on;
- A strong Wi-Fi or cellular connection;
- Location Services turned on: Go to Settings >> Privacy >> Location Services.
Find My app and the Seinxon app cannot be used at the same time.
A Seinxon Finder Card can only be associated with one Apple ID or one Android ID.


The devices compatible with Seinxon Item Finder are as follows:
◆ iPhones:
○ iPhone 17, iPhone 17 Plus, iPhone 17 Pro, iPhone 17 Pro Max, iPhone 17 Air
○ iPhone 16, iPhone 16 Plus, iPhone 16 Pro, iPhone 16 Pro Max, iPhone 16e
○ iPhone 15, iPhone 15 Plus, iPhone 15 Pro, iPhone 15 Pro Max
○ iPhone 14, iPhone 14 Plus, iPhone 14 Pro, iPhone 14 Pro Max
○ iPhone 13, iPhone 13 mini, iPhone 13 Pro, iPhone 13 Pro Max
○ iPhone 12, iPhone 12 mini, iPhone 12 Pro, iPhone 12 Pro Max
○ iPhone 11, iPhone 11 Pro, iPhone 11 Pro Max
○ iPhone XS, iPhone XS Max
○ iPhone XR
○ iPhone X
○ iPhone 8, iPhone 8 Plus
○ iPhone 7, iPhone 7 Plus
○ iPhone SE 2022 - 3rd Generation
○ iPhone SE 2020 - 2nd Generation
◆ iPad:
○ iPad Pro - 2nd to 6th Generation
○ iPad Mini - 5th to 6th Generation
○ iPad Air - 3th to 5th Generation
○ iPad - 6th to 10th Generation
Ⅳ. How to use Find My App? / How to use the Seinxon Finder card for iOS mode?
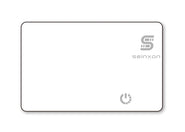
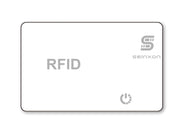
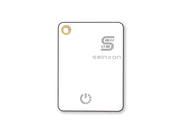
Great news! Our new Elite (wireless charging), Elite Mini (wireless charging), and Finder Tag now feature an updated chip that automatically switches between FMN and BLE modes when connecting via the Find My app or Seinxon app. No more manual switching is required!
Additionally, only the Pro/Pro Max/Mini models currently require manual FMN and BLE mode switching. This change has minimal impact on Apple (iOS) users since the default factory settings for these products are FMN (iOS mode). Apple users can confidently make their purchases.
The Pro/Pro Max/Mini models will also receive an automatic mode-switching update once we've stabilized the software. Please stay tuned!
Pro
Pro Max
Mini

Elite
Elite Mini

Finder Tag
ⅰ. Setup / Add the Items
Before setup, you may know >> Quick Start Guide
- Press and hold the button for about two seconds until hear one beep and also see the blue light flash;
- Turn on Apple Find My app;
- Click "Add Item" in the "Items" tab, then click "Other Supported Item", then follow the instructions shown.
Note: The shipped Seinxon Finders default to Apple FMN mode. Some users may encounter situations where their Apple devices cannot connect. This might be due to accidental actions that put the card into Android BLE mode. You can switch back to Apple FMN mode by following these steps:
- Press and hold the button until you hear 1 beep and 2 beeps in turn, then release it.
- Press and hold the button again within 10 seconds, releasing it each time you hear 1 beep. Repeat this process 2 times in a row.
- If the switch to FMN mode is successful, you will hear only 2 beeps.
(If you still hear 4 beeps, please repeat the above process. You can also learn more from the instructional video below.)
ⅱ. Play Sound & Light
Turn on the Find My app, choose your item, and tap Play sound.
ⅲ. Remove Items
- Navigate to the item page on the Apple Find My app;
- Scroll to the bottom, tap "Remove Item", then tap "Remove";
- It is recommended to restore the card to factory settings after removal.
ⅳ. Restore Factory Settings
Press and hold the button, and you will hear 1 beep, 2 beeps, 3 beeps in sequence until a long beep is heard to end. Just like the following video:
Note: if the card is in BLE mode, it will 4 beeps after restoring the factory setting. If the card is in FMN mode, only 2 beeps will be heard after restoring the factory setting.
ⅴ. Reconnect
Restore the card to factory settings and then perform the setup/add the items.
ⅵ. Disable Mode
In disable mode, the Seinxon Item Finder was shut down, into the super power saving state. In this mode, you will not be able to use the function of the sound and the location tracking.
• Get Into Disable Mode
Press and hold the button, and you will hear 1 beep, 2 beeps, 3 beeps in sequence (total 6 beeps), then release. Just like the following video:
• Relief Disable Mode
○ Method 1:
Press the button until heard 1 beep.
○ Method 2:
Restore the Seinxon Item Finder to factory settings: press and hold the button, and you will hear 1 beep, 2 beeps, 3 beeps in sequence until a long beep is heard to end.
ⅶ. Lost Mode – Mark As Lost
- Open the Find My app, then choose the "Items" tab;
- Select your missing device or item;
- Scroll down to Mark as Lost or Lost Mode, and select Activate or Enable;
- If you want your contact information to appear on a lost device or item, or if you're going to enter custom information to request that someone who finds your device contacts you, follow the onscreen steps;
- Select Activate.
ⅷ. Notify When Left Behind
Click "Notifications", then open "Notify when Left Behind". The device may not be supported if you don't see Notify when dropped.
When you set up Forgotten Notifications, you'll get a notification on your iPhone if you leave your device or item at an unknown location.


Click "Notifications", then open "Notify when Left Behind". The device may not be supported if you don't see Notify when dropped.
When you set up Forgotten Notifications, you'll get a notification on your iPhone if you leave your device or item at an unknown location.
ⅸ. Add Locations You Don't Want To Be Notified About
- On your iPhone, open the Find My app.
- Click on a device or item.
- Under "Notifications," click "Notify When Left Behind".

Set "Home" as a location you don't want to be notified of.
- Tap New Location to add a location where you don't want to be notified when a device or item is left in this location.
- Tap the Delete button next to the location (if you want to be notified if a device or item is left behind at that location).
ⅹ. Unwanted Tracking
Suppose any Seinxon Finder Card separated from its owner is seen moving with you over time. In that case, you'll be notified in one of two ways. These features were created specifically to discourage people from trying to track you without your knowledge.
Find My will notify your Apple device if you have an iPhone, iPad, or iPod touch. This feature is available on iOS or iPadOS 14.5 or later. To receive alerts, make sure that you:
- Go to Settings > Privacy & Security > Location Services, and turn Location Services on;
- Go to Settings > Privacy & Security > Location Services > System Services. Turn to Find My iPhone on;
- Go to Settings > Privacy & Security > Location Services > System Services. Turn Significant Locations on to be notified when you arrive at a significant location, such as your home;
- Go to Settings > Bluetooth, and turn Bluetooth on;
- Go to the Find My app, tap the Me tab, and turn Tracking Notifications on;
- Turn off airplane mode. You won't receive tracking notifications if your device is in airplane mode.
An AirTag, AirPods Pro (2nd generation) charging case, or Find My network accessory that isn't with its owner for a while will emit a sound when it's moved.
Ⅴ. How to charge?
ⅰ. Charge the Seinxon Item Finder
- Use a 5V 1A adapter, and plug the Type-C charging cable into the Charger Clip's connection port;
- Then, align the thimble of the Charger Clip with two charging contacts on the card, and clamp it;
- If the light is red and blinking one by one, it indicates that the card is charging.


ⅱ. How can I check the status of the Charger Clip?
Just check the Charger Clip's light.
• Blue Light - Power connected, ready to charge.
• Red Light - Device is actively charging.
• Green Light - Charging complete, the device is fully charged.
ⅲ. Why isn't my Charger Clip working?
You can try:
- checking that the Charger Clip's thimble is aligned with the two charging contacts on the card;
- checking if anything foreign matters on the charging contacts of the card, and cleaning them with water;
- covering the Finder Card with a soft cloth and tapping the charging contacts with a hard object through the cloth.
Need More Help?
Contact Us